Show Page Views in Next.js with Google Analytics

Track page views with Google Analytics
Google Analytics Account setup
Before connecting to Google APIs we need to gain access, so follow the next steps:
Go to the Google Developer Console and create a new project.

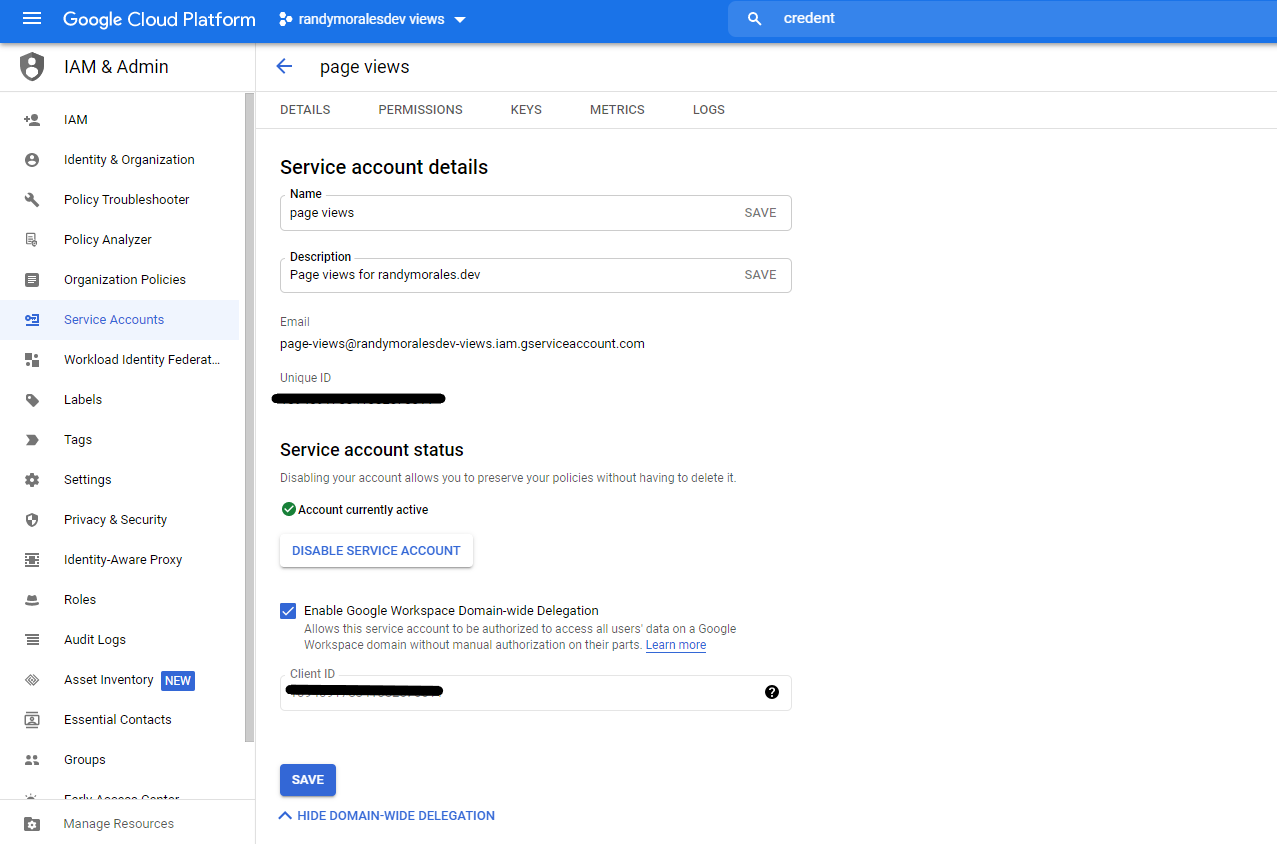
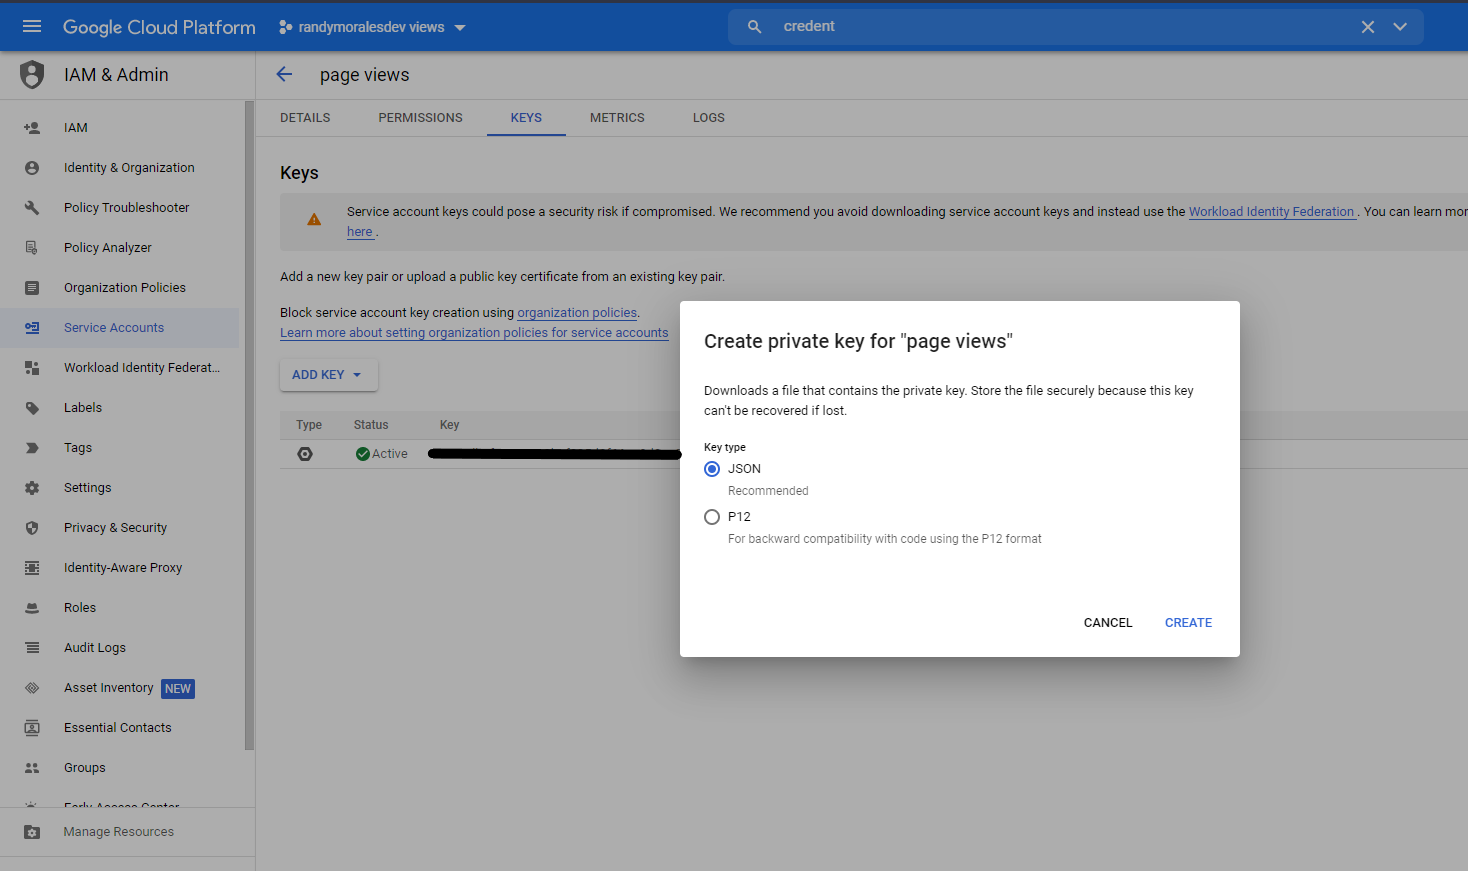
Go to the Credentials section (use the search bar and look for "credentials"), select Create Credentials and choose Service Account. Go into the Service Account details and expand the section Show domain-wide delegation and check the option Enable G Suite Domain-wide Delegation. Then select Keys tab (above in that page), click on Add Key then Create New Key, choose JSON and click Create. Save the JSON file, we will need it later and hit the "Save" button at the bottom of the page.
Navigate back to the project home (Dashboard) and select + Enable APIs and Services.

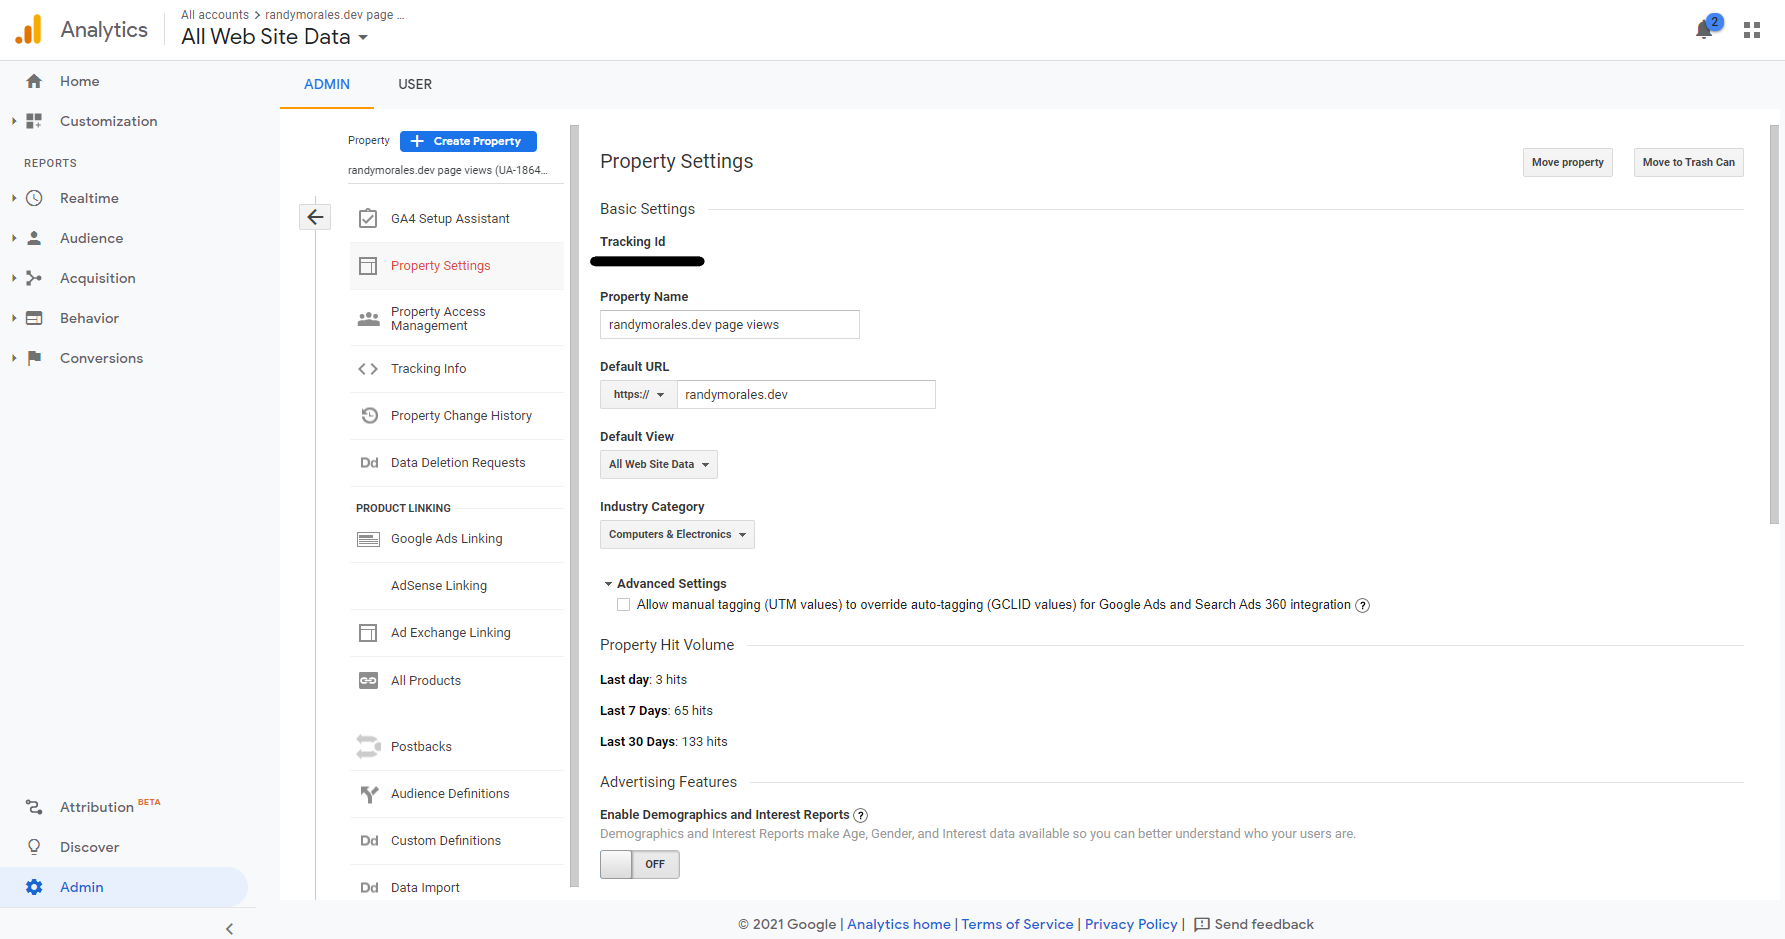
Look for and enable Google Analytics API. Go the Google Analytics Dashboard. Once you've selected the right Analytics account, go to the Admin panel (gear icon). Add a new account, the email address is the one you can find in the field client_email of the JSON file you saved before. Click on Create Property. This will give us a Tracking ID like UA-XXXXXXXXX-X. Save this ID since we will need it later.
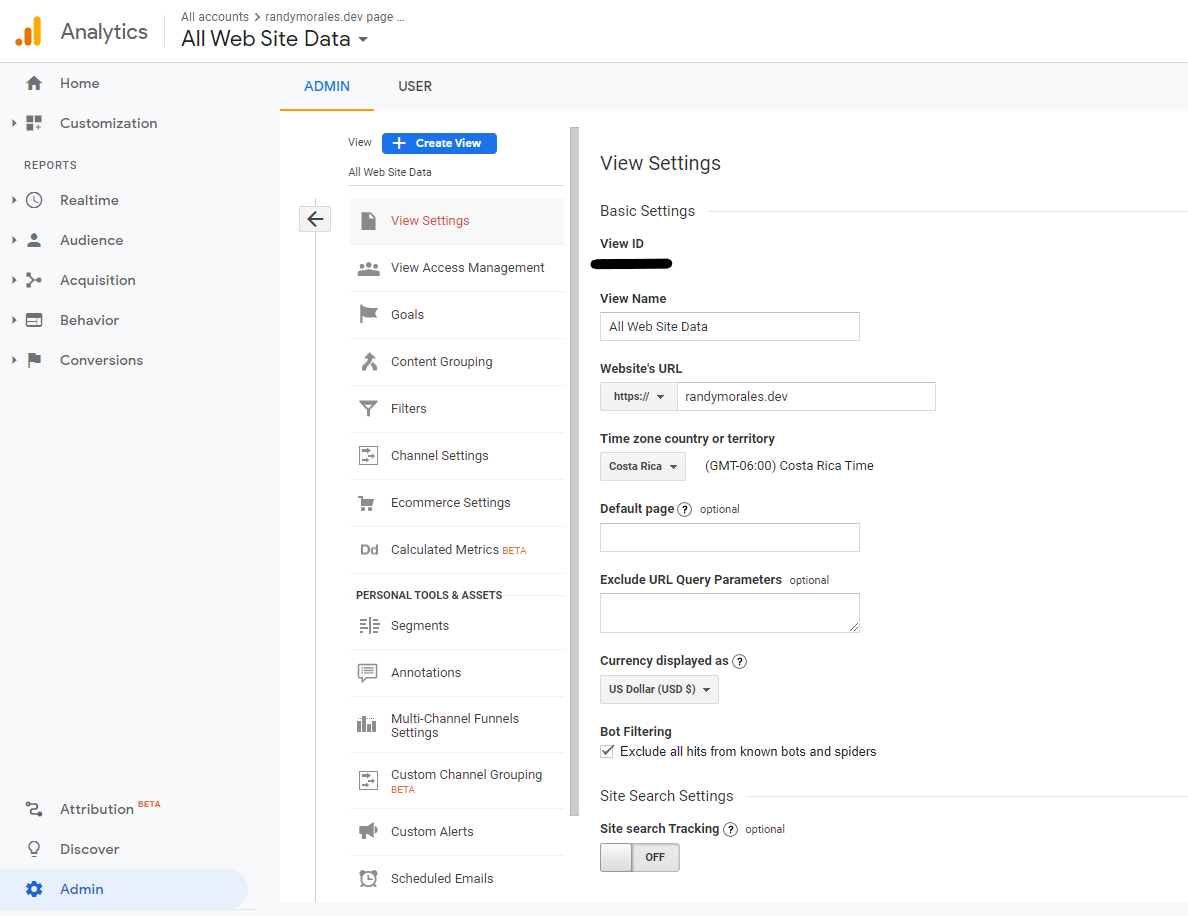
With that property selected, click on Create View. This will give us a View ID. Save this ID since we will need it later.
Add Google Analytics secrets to the project
In order to connect to Google Analytics API and get the page views for a specific URL, we need to install Google APIs Node.js Client.
npm install googleapis --save
# or
yarn add googleapis
OK, let's add our secrets keys within environment variables. For this we are going to create a .env.local file in the root of the project.
GOOGLE_ANALYTICS_VIEW_ID=123456789
GOOGLE_CLIENT_EMAIL=service-account@project.iam.gserviceaccount.com
GOOGLE_CLIENT_ID=1234567890
GOOGLE_PRIVATE_KEY="-----BEGIN PRIVATE KEY-----\nR2D2=\n-----END PRIVATE KEY-----\n"
GOOGLE_ANALYTICS_VIEW_ID is the View ID.
The other values are provided in the JSON file we saved previously:
GOOGLE_CLIENT_EMAIL->client_emailGOOGLE_CLIENT_ID->client_idGOOGLE_PRIVATE_KEY->private_key
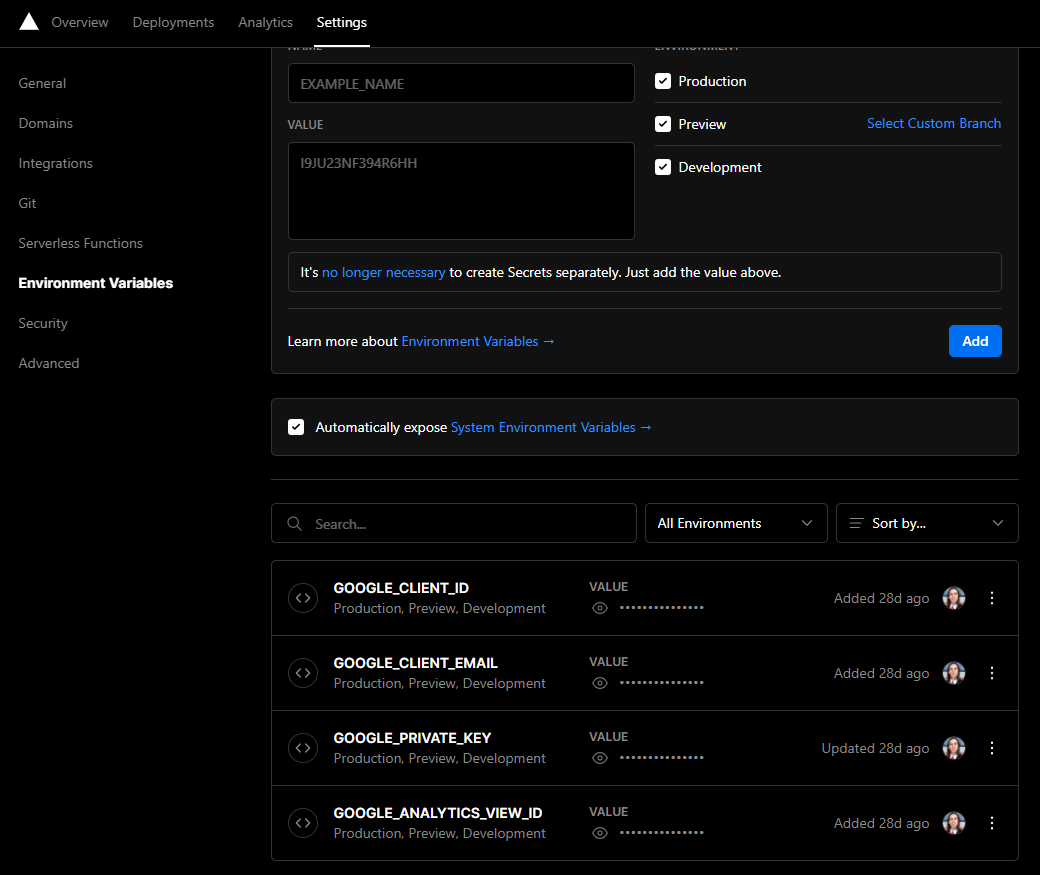
At this point we will be able to access these values by using process.env.GOOGLE_CLIENT_EMAIL which is possible thanks to Next.js' Environment Variables.
For production, it is required to register these variables where the project is deployed to the public. I use Vercel and this is how it looks:
Code setup
First, create a small module in the route of your preference that will basically expose three things:
- The Google Analytics Tracking ID.
- A
pageviewmethod. - An
eventmethod.
In my case, I created it inside the top-level lib folder and called it gtag.js.
export const GA_TRACKING_ID = 'UA-XXXXXXXXX-X';

export const pageview = (url, title) => {
  window.gtag('config', GA_TRACKING_ID, {
    page_location: url,
    page_title: title,
  });
};

export const event = ({ action, category, label, value }) => {
  window.gtag('event', action, {
    event_category: category,
    event_label: label,
    value: value,
  });
};
Secondly, let's modify the _document.js file inside the pages directory to include the Google Analytics JavaScript snippet.
import Document, { Html, Head, Main, NextScript } from 'next/document';
import { GA_TRACKING_ID } from '@/lib/gtag';

class MyDocument extends Document {
  render() {
    return (
      <Html>
        <Head>
          ...
          {/Global Site Tag (gtag.js) Google Analytics -/}
          {GA_TRACKING_ID ? (
            <>
              <script
                async
                src={`https://www.googletagmanager.com/gtag/js?id=${GA_TRACKING_ID}`}
              />
              <script
                dangerouslySetInnerHTML={{
                  __html: `
                window.dataLayer = window.dataLayer || [];
                function gtag(){dataLayer.push(arguments);}
                gtag('js', new Date());
                gtag('config', '${GA_TRACKING_ID}');
              `,
                }}
              />
            </>
          ) : null}
          ...
        </Head>
        <body>
          <Main />
          <NextScript />
        </body>
      </Html>
    );
  }
}

export default MyDocument;
This asynchronously injects the snippet that initializes Google Analytics, helping to keep a good performance.
Third, we need to track a page view each time a router transitions. In order to achieve this, we are going to use Next.js' Router itself to execute a callback function each time the route changes: the event routeChangeComplete is the one we want to use in this case. Let's update _app.js with the corresponding code:
import { useEffect } from 'react';
import { pageview } from '@/lib/gtag';

const MyApp = ({ Component, pageProps, router }) => {
  ...
  useEffect(() => {
    const handleRouteChange = url => {
      pageview(url, document.title);
    };
    router.events.on('routeChangeComplete', handleRouteChange);
    return () => {
      router.events.off('routeChangeComplete', handleRouteChange);
    };
  }, []);

  ...
};

export default MyApp;
Display a page views counter with data from Google Analytics
Google Analytics API connection
Let's take advantage of Next.js' API Routes for this.
First, create a new file inside the pages/api folder called page-views.js:
import { google } from 'googleapis'

const pageViewsAPI = async (req, res) => {
  const startDate = req.query.startDate || '2021-01-01'
  const post = req.query.post

  try {
    const auth = new google.auth.GoogleAuth({
      credentials: {
        client_email: process.env.GOOGLE_CLIENT_EMAIL,
        client_id: process.env.GOOGLE_CLIENT_ID,
        private_key: process.env.GOOGLE_PRIVATE_KEY,
      },
      scopes: ['https://www.googleapis.com/auth/analytics.readonly'],
    })

    const analytics = google.analytics({
      auth,
      version: 'v3',
    })

    const response = await analytics.data.ga.get({
      ids: `ga:${process.env.GOOGLE_ANALYTICS_VIEW_ID}`,
      metrics: 'ga:pageviews',
      dimensions: 'ga:pagePath',
      ...(post ? { filters: `ga:pagePath==${post}` } : {}),
      'start-date': startDate,
      'end-date': 'today',
    })

    const pageViews = response?.data?.totalsForAllResults['ga:pageviews']

    return res.status(200).json({
      pageViews,
    })
  } catch (err) {
    return res.status(500).json({ error: err.message })
  }
}

export default pageViewsAPI
This handler will expect two parameters in the query string: startDate and post which will be used for filtering the results.
Import the googleapis package and create the credentials.
Next, instantiate Google Analytics v3 client and perform the call to get the metrics.
The filters parameter restricts the results to the specific URL.
The startDate parameter, if not provided, will be set to 2021-01-01 to retrieve data since that date.
Go ahead and open an URL like
http://localhost:3000/api/page-views?post=%2Fblog%2Fadding-comments-to-my-blogIn this case I'm providing a valid and existing post, which shows the following result:

Display counter in every post
Now it's time to connect each blog post page to the API endpoint and display the views counter. We are going to use SWR, you can install it via:
npm install swr --save
# or
yarn add swr
My blog post pages are served under pages/blog/[id].js, here are the required changes to display the counter:
import useSWR from 'swr';

export default function Post({ postData }) {
  ...
  // Page views count
  const { data } = useSWR(
    `/api/page-views?post=${encodeURIComponent(PostsDirectory + postData.id)}`,
    async url => {
      const res = await fetch(url)
      return res.json()
    },
    { revalidateOnFocus: false },
  )
  const views = data?.pageViews

  return (
    <>
      ...
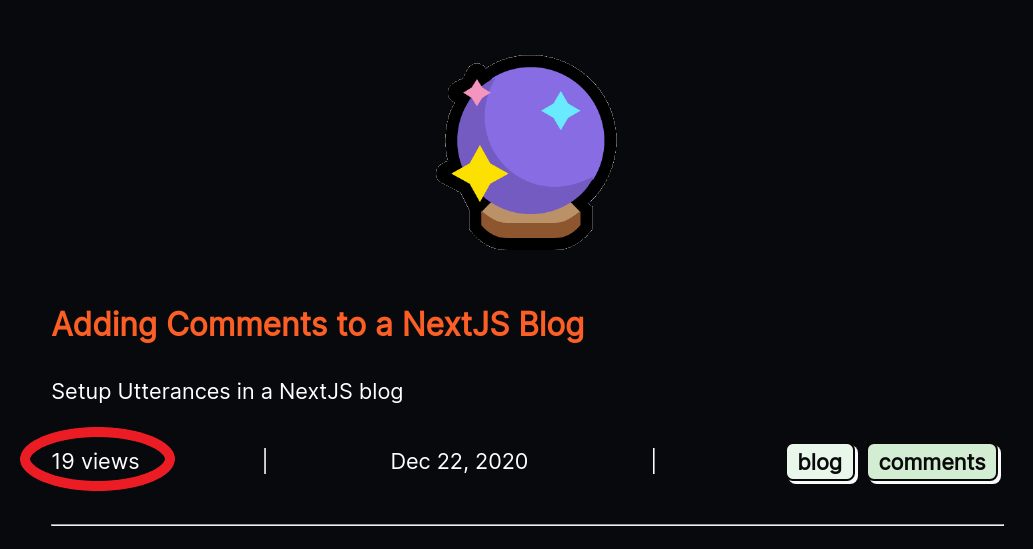
      <div>{views} views</div>
      ...
    </>
  );
}
Finally, we have our page views count ready and working.
References

Randy Morales
Software Engineer passionate about cloud technologies, system design, and building scalable solutions.